Wednesday, February 25, 2009

the first cmyk at arcadia


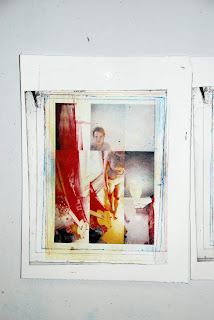
Today I pulled the first CMYK photo intaglio-type to come off the press at Arcadia. The image has the same problems that the b/w one has below but I am more optimistic with this product. It still seems blown out to some degree and a lot of the softer details seem to have been lost but thats what tweeking is all about.

Tuesday, February 24, 2009

Starting CMYK


After I finished working on Dan's plates I am beginning to start the research to get CMYK printing to work at Arcadia. This is the first test, a greyscale version of the full color image. 5LU, 8 min development at 89% dot. The image feels fuzzy to me and not as crisp as i'd like it to be. This could be because I added Noise .5 and added a Gausin Blur 1.0. The dots are showing up well, but I can't get a handle on why it looks this way? or is this as good as it will look?

Thursday, February 19, 2009

Hands...


So all that is left is to pack the tubes and ship them off to the gallery. My hands are wrecked, see above. I think I washed them over 100 times last night, all the more reason to get a printing assistant. Still no sleep, but I am feeling pretty good after a nap or two.

CROSS WIRES...


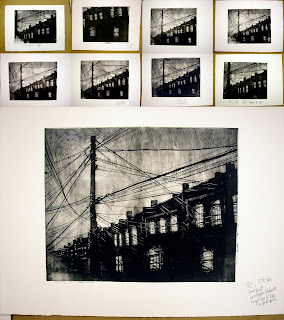
THis one, same deal as Wyeth. More versions to get out there, but it's looking good. The sun came up, Season 3 of Pete n' Pete is on the TV and my stomach is doing a good job with all that pizza.

the last of them....


code name "WYETH", i pulled this image from three separate plates this evening and I think I found a good one. The first attempt had some areas that were on the verge of open bite so I went and extended the exposure. This worked well and they are coming out nice. Now I just have to get a couple more nice ones before I fall asleep.

5:16 am, code name "FLASHLIGHT"


I am feeling a bit fuzzy, half way done. Now I have to re-laminate two plates from early, expose and print them again. All in all I should be finished by noonish. I am happy to see FLASHLIGHT up to it's full size after staring at it at 8"x10" for weeks. Seriously , I couldn't do this with out pete n pete. The Night-crawlers episode has new meaning....

Wednesday, February 18, 2009

from 10pm to 1am, code-name "Sword"


So I got a late start tonight on account that I was teaching up till around 9pm this evening. I started printing code name "Wyeth" but after four prints decided that I needed a do over on the exposure. I moved on to "Cross Wires" but was experiencing the same problem so I had to scrap that plate as well. "Sword" is coming out well and I am pretty happy with it so far, no major problems. I have pizza in my belly a 2 liter of coke sitting outside the door, and Pete n' Pete on the TV.

Tuesday, February 17, 2009

The three so far

SWORD


SWORD, rough version. Everything I did today is in the stripper and going to get re-laminated tonight for tomorrow. Tomorrow I am pulling all night to get things ready for mailing to the gallery on Friday. I am pretty happy with the plates but I am having issues with the press. The flat bed is not level, so it's throwing all of the pressure application from the rollers. So basically I get ghost spots which can sometimes look cool but I am worried they will be inconsistent.

Weyth


So after I got things working with "wires" i moved on to a new image and after the first print it's looking pretty good. I am taking a break, watching some futurama and getting ready to give a talk in the gallery.

Crossed Wires...


I think i got things figured out today, just going through the images, making exposures and seeing how they turn out. I have been working on "Crossed Wires" for almost a week and I am glad to be near the end of the process.

Monday, February 16, 2009

getting closer


Today i pushed to the full size image...i am getting close, it seems that most of the research I have been completing fell apart when the size got larger. The image is plagued with open bite areas that need remedy, but I can get a sense of how great these are going to look when I get there.

Sunday, February 15, 2009

done...


a little blurry, but after at least two weeks of work I found a way to make things go right. The trick is that I exposed a little longer, only .2 of a LU, then hand developed, or over developed the foreground to get it to where it needed to be. It's not as precise as I would like but it will work.

two images in one


My basic problem was this; i'd get the back ground and black tree to read well, but loose detail in foreground, and vice versa. Ideally I needed to make two exposures but things don't work that way. you can see the background here all open bit but with perfect detail in the foreground.

LU tests


Once the % of dot is found, it's time to mess with the exposure. Here are three separate Light Unit exposure tests.

21 scale step test.


One the essential parts of this process is determining the % of a black area of an image. That is to say that if you drag the color sampler tool in photo shop over your image and you find an area of black at 100% it means that the are is so solid that no light will pass through it. If we expose that to an ImagOn plate it will open bite, meaning that light won't got through the image it will form around the image. Since in intaglio printing we need ink to get into groves of the plate we need to open the dots of an image to a certain percentage that will allow just enough light to pass through the black areas to create the dot structure needed for that area to print black. You can see on this test where the 100 and 95% areas are washed away, they have open bit. The first line of black indicates the proper percentage needed.

beginning with the lazar version


So to start this whole project off I was working with lazar print positives to make images. I got one working well and showed it to Dan who was pleased but unhappy with the uniform dot you get from a lazar printer. So i set to work using an Epson 3000 to make positives. The Epson 3000 is key to this process because it allows for a randomized dot pattern along with printing black directly from the black cartridge. A composite would allow light to pass through the dots and destroy the image.

Starting work on the Dan Danger's


So this is the mega research preliminary stages of the work I am doing for the Daniel Danger show at the Richard Goodall Gallery. I am going to get into detail about some of the images but the basic working method here is to knock out a couple of variables which will get you the image you want. First you have to start out with material tests (what you tell the printer you are printing on), then exposure tests to determine time of exposure and percentage of dot, then development time. Once all four of these factors are worked out you end up with an image with no opening biting, solid blacks, solid whites and a wide range of mid-tones.